Kullanıcılar genellikle Windows 10'u Windows Update (WU) aracılığıyla güncellemeye çalıştıktan sonra bu sorunla karşılaşır . 0x8024a105 hatasıOtomatik Güncelleştirmeler bileşenlerinde bir sorun olduğunu gösterir .Genellikle, başarısız bir güncellemeden sonra kullanıcılar şu mesajı görürler:
"Bazı güncellemeleri indirirken sorunlar oldu, ancak daha sonra tekrar deneyeceğiz. Bunu görmeye devam ederseniz, web'de arama yapmayı veya yardım için desteğe başvurmayı deneyin. Bu hata kodu yardımcı olabilir: (0x8024a105). ”

Şu anda bu sorunla uğraşıyorsanız, sizinle benzer bir durumda olan kullanıcılara başarıyla yardımcı olan birkaç uygulanabilir düzeltmeyi belirledik. Sorununuzu çözmeyi başaran bir çözümle karşılaşana kadar lütfen aşağıdaki yöntemlerin her birini izleyin.
Yöntem 1: Windows Update sorun gidericisini çalıştırma
Windows Update sorun gidericisini çalıştırarak basit bir şekilde başlayalım . Bazı kullanıcılar, yerleşik sorun gidericinin bozuk bileşenleri otomatik olarak düzeltmesine izin vererek güncellemelerin geçmesine izin vermeyi başardılar. Windows Update Sorun Giderici'nin nasıl çalıştırılacağına dair hızlı bir kılavuz :
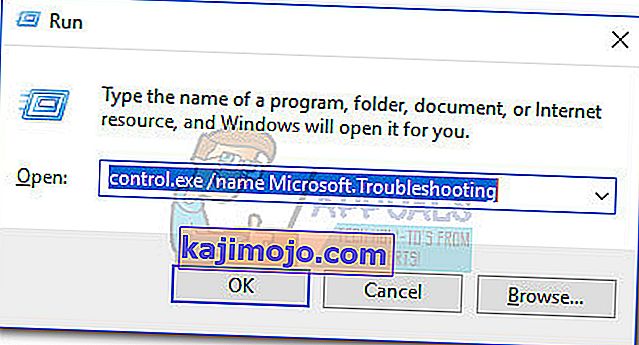
- Çalıştır penceresini açmak için Windows tuşu + R tuşlarına basın . Aşağıdakileri yazın veya yapıştırın.
control.exe / Microsoft adı. Sorun giderme
Yerleşik sorun gidericiyi açmak için Enter tuşuna basın.
- In giderme penceresinde, tıklayın Windows Update , sonra üzerine tıklayın Run sorun giderici .
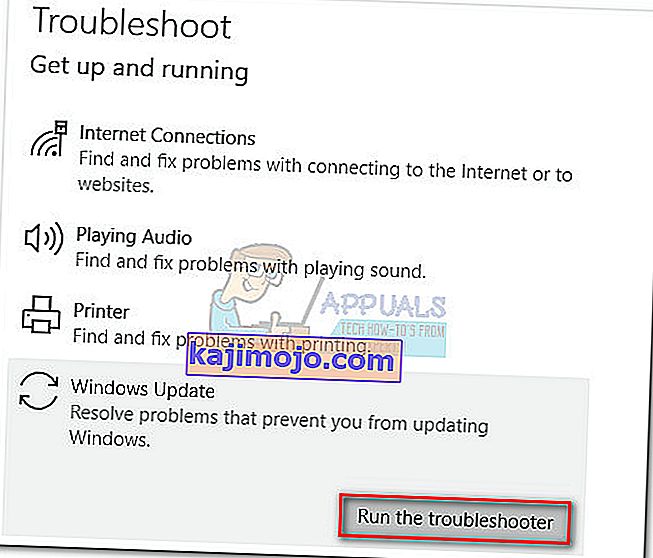
- Sorun giderici, güncelleme istemcinizle ilgili sorunları algılayana kadar bekleyin. Bununla ilgili herhangi bir sorunu belirlemeyi başarırsa, otomatik onarımı tetiklemek için ekrandaki talimatları izleyin. Genellikle, bu düzeltmeyi uygulamayı seçmeniz gerekir .
- Eğer Güncelleme Sorun Giderici o onarım şey başardı bildirir, bilgisayarınızı yeniden başlatın ve sorunu önümüzdeki açılışta giderilip giderilmediğini görmek.


Güncellemeler 0x8024a105 hatasıyla hala başarısız oluyorsa , Yöntem 2'ye geçin .
Yöntem 2: Kullanıcı Hesabı Denetimi (UAC) Ayarlarını Değiştirin
Sorun giderici, sorunu otomatik olarak düzeltmeyi başaramadıysa, sorunun bir Kullanıcı Hesabı Denetimi ayarı tarafından oluşturulup oluşturulmadığını görelim . Görünüşe göre , oturum açmış hesabın gerekli izinlere sahip olmaması nedeniyle bazı güncellemeler 0x8024a105 hatasıyla başarısız oluyordu . Hesabınızla ilgili Kullanıcı Hesapları izinlerini Yönetici olarak değiştirerek bu sorunu kolayca çözebilirsiniz . İşte bunu yapmak için hızlı bir rehber:
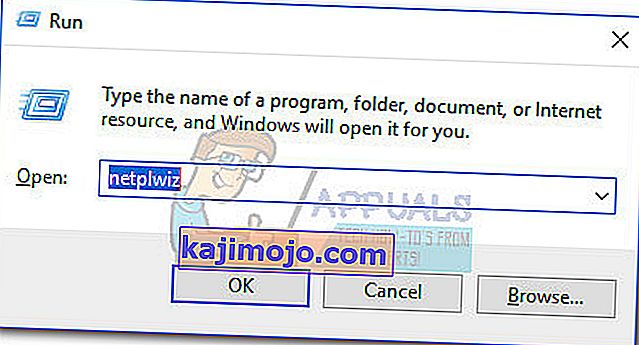
- Çalıştır penceresini açmak için Windows tuşu + R tuşlarına basın . " Netplwiz " yazın veya yapıştırın ve yerleşik sorun gidericiyi açmak için Enter tuşuna basın.
- Gelen Kullanıcılar sekmesi, kullandığınız o kullanıcıyı seçip tıklayın Özellikler.
- Gelen Özellikler penceresine gidin Grup Üyeliği ve erişim düzeyini ayarlamak Yönetici . Hit uygula Değişiklikleri kaydetmek için.
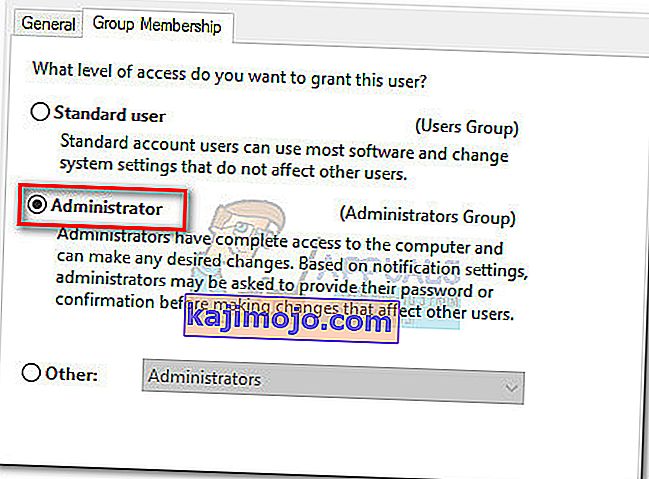 Not: Erişim düzeyi zaten Yönetici olarak ayarlanmışsa , doğrudan Yöntem 3'e geçin .
 - Bilgisayarınızı yeniden başlatın ve aynı kullanıcı hesabıyla oturum açtığınızdan emin olun. Başlangıç tamamlandığında, güncellemeleri tekrar gerçekleştirmeyi deneyin. Bunların 0x8024a105 hatasıyla başarısız olduğunu görürseniz , üçüncü yönteme geçin.

 Not: Erişim düzeyi zaten Yönetici olarak ayarlanmışsa , doğrudan Yöntem 3'e geçin .
Yöntem 3: Windows Updates bileşenlerini el ile sıfırlama
Yukarıdaki yöntemlerin başarısız olduğu kanıtlanırsa, Windows Updates Bileşenlerini manuel olarak sıfırlamak ve ardından Windows Update işlemini yeniden başlatmaktan başka seçeneğimiz yoktur . Öne çıkan dört yöntemden, bu yöntem daha yüksek bir başarı olasılığına sahiptir, ancak daha fazla ince ayar gerektirir.
Windows Updates bileşenlerini sıfırlamak için hızlı bir kılavuz:
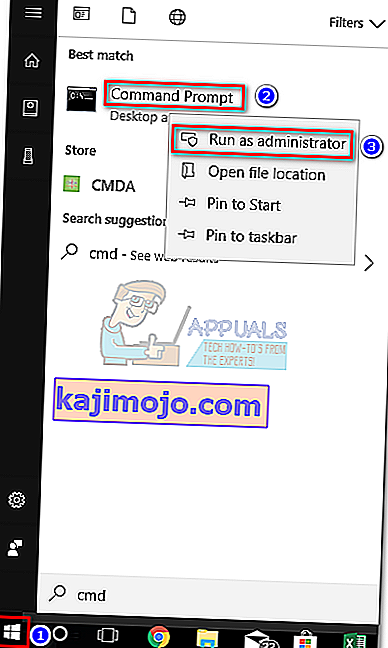
- Click Windows Başlat çubuğu (sol alt köşesinde) ve “için arama cmd “. Ardından, Komut istemine sağ tıklayın ve Yönetici Olarak Çalıştır'ı seçin .
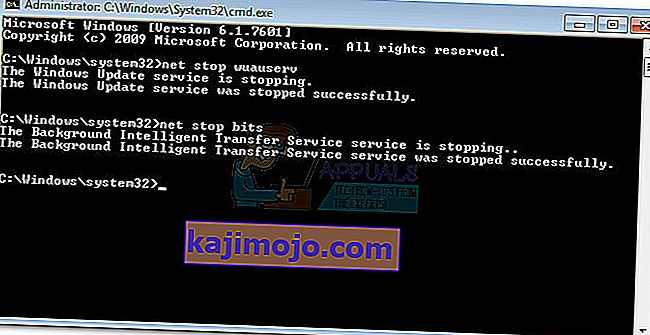
- In yükselmiş Komutanlığı İstemi, biz hizmetlerini durdurmak için gidiyoruz MSI Installer, Windows Update, BITS ve kriptografik . Bunu yapmak için aşağıdaki komutları girin ve her birinin ardından Enter tuşuna basın:
net stop wuauserv net stop cryptSvc net stop bitleri net stop msiserver
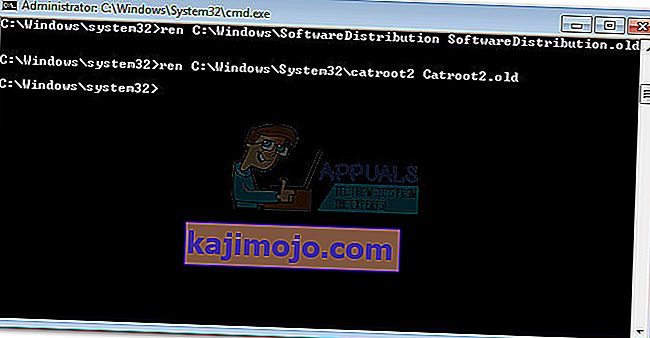
- Tüm hizmetler durdurulduktan sonra, Windows Update'i bileşenlerini yeniden başlatmaya zorlamak için SoftwareDistribution klasörünü ve Catroot2 klasörünü yeniden adlandıralım . İki komutu yükseltilmiş Komut istemine yapıştırın veya yazın ve her birinin ardından Enter tuşuna basın:
ren C: \ Windows \ SoftwareDistribution SoftwareDistribution.old
ren C: \ Windows \ System32 \ catroot2 Catroot2.old
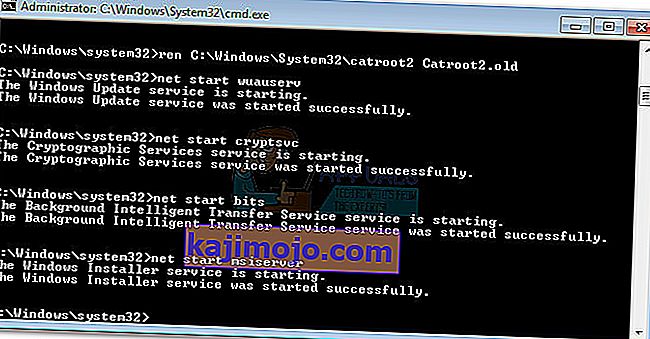
- İki klasör yeniden adlandırıldıktan sonra, MSI Installer, BITS, Cryptographic ve Windows Update hizmetlerini yeniden başlatma zamanı. Bunu yapmak için, Komut İstemi'ne aşağıdaki komutu yazın ve her komutun ardından Enter tuşuna basın :
net başlangıç wuauserv net başlangıç cryptSvc net başlangıç bitleri net başlangıç msiserver
- Hizmetler yeniden başlatıldıktan sonra, yükseltilmiş Komut İstemi'ni kapatın ve bilgisayarınızı yeniden başlatın.


Yöntem 4: Yazılım Dağıtım Klasörünü Silin
Bazı durumlarda, sorun Powershell kullanılarak bir klasör silinerek çözülebilir. Bu nedenle, bu adımda önce PowerShell'i yönetici olarak çalıştıracağız ve ardından güncelleme sürecini başlatmak için Yazılım dağıtım klasörünü sileceğiz. Bunun için:
- Press “Windows” + “X” buttons simultaneously and select the “Power Shell(Admin)” option.
- Type in the following command and press “Enter” to execute it.
net stop wuauserv
- Again, type in the following command and press “Enter”.
net stop bits
- Lastly, navigate to the following folder.
C:\Windows\SoftwareDistribution
- Press “Ctrl” + “A” to select all the contents of the folder and press “Shift” + “Del” button to delete them permanently.

- Confirm any prompts that warn you about deleting these files and then reboot your computer to complete the process.
- Now, try to update and check to see if the issue persists.

Once your computer boots back up, see whether you are able to install the updates without the 0x8024a105 error. If you do, try to perform an SFC scan to fix any issues with missing files or drivers.
Method 5: Update Using Media Creation Tool
In some cases, you might be unable to update your computer using the default Windows Update process because your Windows might not be able to establish a proper connection with the Update servers. Therefore, in this step, we will be deploying the Windows Media Creation Tool to perform the update for us. It will automatically download and install the update files to upgrade our Windows. For that:
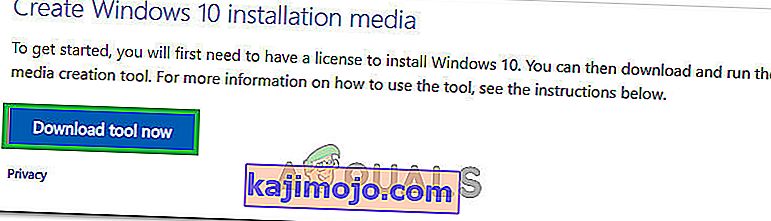
- Download the Windows Media Creation Tool from here.
- Run the executable and follow with the on-screen instructions for the initial setup.
- After the initial setup, select the “Upgrade this PC” option and click on “Next”.
- Accept the License terms and let the installer run.
- The tool will now automatically grab the update files from the servers and update your computer to the latest version available.
- Check to see if doing so has fixed the error.

Method 6: Delete Download Folders
When a new update is downloaded, it is generally stored in some folders on the computer. In this step, we will be deleting some of these folders and which will prompt the operating system to go ahead and download new files which can sometimes clear out the error and the update will be applied normally. For that:
- Press “Windows” + “R” to open the Run prompt.
- Type in “Control Panel” and press “Enter” to launch the classical control panel interface.
- In the Control Panel, click on the “View By:” option and select “Large Icons” from the list.
- Click on the “File Explorer Options” and a new window should pop up.
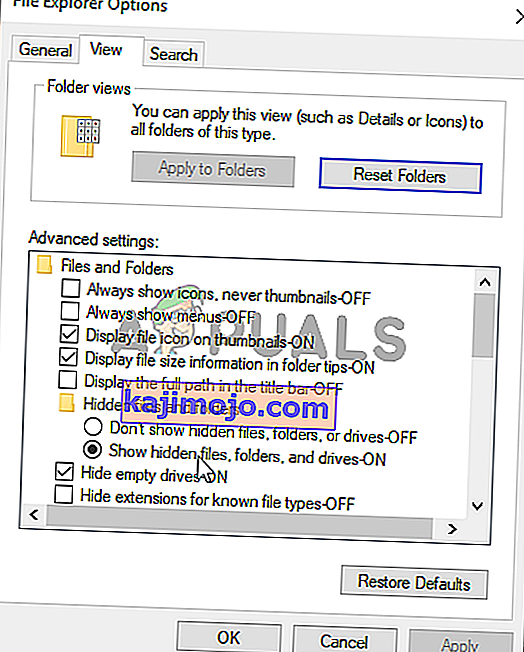
- In the File Explorer Options, click on the “View” button and then double click on the “Files and Folders” button to expand it.
- After that, double click on the ‘Hidden Files and Folders” to expand it as well.
- Check the “Show hidden Files, Folders and Drives” option and click on “Apply” to save your changes.
- Click on “OK” to close out of the window and press “Windows’ + “E” to launch the file explorer.
- In the File Explorer, delete the “$Windows.~WS” and “$Windows. ~BT” folders.
- Make sure to clear out the recycle bin as well so that they cannot be recovered.
- After this, press “Windows’ + “I” to launch settings and click on the “Update and Security” option.

- In Update and Security, click on the “Windows Update” option on the left pane and then click on the “Check for Updates” button.
- Updates will now automatically be downloaded and installed.
- Check to see if the issue persists.


Method 7: Resetting Catroot2 Folder
In some cases, it is possible that the Catroot2 folder and its files have either been corrupted or they have been misconfigured due to which this issue is being triggered. Therefore, in this step, we will first be making some changes from the command prompt and then we will delete the files inside that folder. For that:
- Press “Windows’ + “R” to launch the run prompt.
- Type in “cmd” and then press “Shift” + “Ctrl” + “Enter” to provide administrative privileges.
- Type in the following command and press “Enter” to execute it.
net stop cryptsvc
- After you have stopped the cryptsvc using the command above, type in the following commands into the command prompt one by one and press “Enter” after each to execute them on your computer.
md %systemroot%system32catroot2.old xcopy %systemroot%system32catroot2 %systemroot%system32catroot2.old /s
- After executing the commands stated above, we will be deleting all the files from the catroot folder without deleting the folder itself.
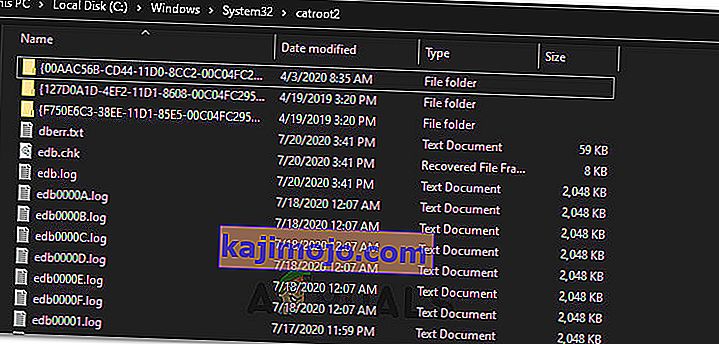
- Press “Windows’ + “R” to open the Run prompt and type in the following address to navigate to the catroot folder.
C:/Windows/System32/catroot2
- Press “Ctrl” + “A” once inside the folder to select all items inside it and press “Shift” + “Delete” to remove them from your computer.
- After removing these, confirm any prompts that might spring up on your screen.
- After that, open the command prompt back up and execute the following command.
net start cryptsvc
- Try to update your computer and check to see if the issue still persists.


Method 8: Configuring Services to Start Automatically
Sometimes, your computer might be preventing certain services from starting and functioning in the background due to which the update might not be properly installed or configured to be applied on your computer. Therefore, in this step, we will be setting up some services to startup automatically. For that:
- Press “Windows’ + “R” to launch the Run prompt.
- Type in “cmd” and press “Ctrl” + “Shift” + “Enter” to provide admin permissions.

- Type in the following commands one by one in the command prompt and press “Enter” after each to execute them.
SC Config wuauserv start=auto SC Config bits start=auto SC Config cryptsvc start=auto SC Config trustedinstaller start=auto
- This way, we will have configured these services to startup and run automatically in the background.
- Check to see if the issue persists.

Method 9: Re-register Windows Update and BITS Files
It is possible that some windows update files and Bits files might not be properly registered on your computer. Therefore, in this step, we will be re-registering these files on the computer and then we will check to see if that fixes our issue. For that:
- Press “Windows’ + “R’ to open the Run prompt.
- Type in “cmd” and then press the “Ctrl” + “Shift” + “Enter” buttons to provide admin permissions.

Type in the following commands one by one and press “Enter” after each to register the components.regsvr32.exe atl.dll regsvr32.exe urlmon.dll regsvr32.exe mshtml.dll regsvr32.exe shdocvw.dll regsvr32.exe browseui.dll regsvr32.exe jscript.dll regsvr32.exe vbscript.dll regsvr32.exe scrrun.dll regsvr32.exe msxml.dll regsvr32.exe msxml3.dll regsvr32.exe msxml6.dll regsvr32.exe actxprxy.dll regsvr32.exe softpub.dll regsvr32.exe wintrust.dll regsvr32.exe dssenh.dll regsvr32.exe rsaenh.dll regsvr32.exe gpkcsp.dll regsvr32.exe sccbase.dll regsvr32.exe slbcsp.dll regsvr32.exe cryptdlg.dll regsvr32.exe oleaut32.dll regsvr32.exe ole32.dll regsvr32.exe shell32.dll regsvr32.exe initpki.dll regsvr32.exe wuapi.dll regsvr32.exe wuaueng.dll regsvr32.exe wuaueng1.dll regsvr32.exe wucltui.dll regsvr32.exe wups.dll regsvr32.exe wups2.dll regsvr32.exe wuweb.dll regsvr32.exe qmgr.dll regsvr32.exe qmgrprxy.dll regsvr32.exe wucltux.dll regsvr32.exe muweb.dll regsvr32.exe wuwebv.dll
- After executing the commands listed above, check to see if the issue still persists.

Note: After trying the following fixes, if the issue still persists, try to perform a clean boot and check if that fixes it. If it does, update in the clean boot and then get out of it after the update is completed. If that doesn’t work, try to go for a clean install of Windows.