0xC000000E Eğer bozuk karşı karşıya olduğumuz pencere araçlarını boot çalışırken hata Önyükleme yapılandırma verileri. Önyükleme Yapılandırma Verileri, daha yeni Windows PC'lerde önyüklemeyle ilgili tüm seçenekler ve ayarlar için küresel bir depodur.
Aygıtınızı başlatmaya çalışırken bu hatayı alacaksınız ve bir yükleme diski veya kurtarma sürücüsü kullanarak bilgisayarınızı nasıl onaracağınıza dair talimatlar veren siyah bir ekran karşınıza çıkacak. Ne yazık ki, bu kurtarma sürücüsüne sahip olmak bu sorunu çözmenin tek yoludur, bu yüzden başlamadan önce bir tanesine el atmalısınız. Buna sahip değilseniz, başka bir PC veya Dizüstü bilgisayardan Rufus veya Windows Media Creation aracını kullanarak bir tane oluşturmak oldukça kolaydır .

Önyükleme sırasını değiştirmek ve bilgisayarınızı sabit sürücünüz yerine kurtarma sürücüsünden başlatmak için BIOS'unuza da önyükleme yapmanız gerekecektir. Bunu yapmak için aşağıdaki adımları kullanın:
- Windows önyüklemeden önce ana kart üreticinizin belirlediği tuşa basarak BIOS veya UEFI ayarlarına girin . Bu anahtar, üreticiye bağlı olarak genellikle Esc, Delete, F2, F8, F10, F12 veya Backspace'dir. BIOS'a nasıl gireceğinize dair çevrimiçi bir arama ve ardından bilgisayar modelinizi yapabilirsiniz.
- İçeri girdikten sonra, Önyükleme'ye gidin Önyükleme sıranızı değiştirmek için BIOS'ta bulunan talimatları kullanın ve kurtarma sürücünüzün CD veya flash sürücü olmasına bağlı olarak CD-ROM'u veya USB bağlantı noktasını ilk aygıt olarak ayarlayın. .
- Ayarlarınızı kaydedin ve çıkın.

Yöntem 1: Önyükleme Yapılandırma Verilerini Yeniden Oluşturun
Bunu yapmak için, bilgisayarınızı kurtarma sürücüsünden başlatmanız gerekecektir. BIOS'unuzu yukarıdaki adımlarla yapılandırdıysanız , ekranınızda komut istemi göründüğünde herhangi bir tuşa basarak bunu yapabilirsiniz . Bilgisayar kurtarma sürücüsünden başlatıldığında, BCD'yi yeniden oluşturmak için aşağıdaki adımları izleyin:
- In Windows Kurulumu iletişim kutusunda, uygun değerlere ayarlamak her şey, dilinizi seçip
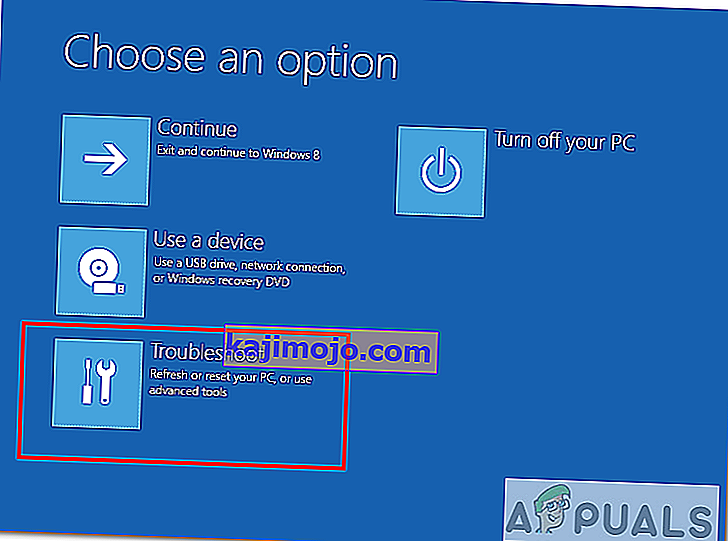
- Sol alt köşede, tıklayın Onarım bilgisayarınızı için ve seçim Giderileceği gelen bir seçenek belirleyin ekranında.
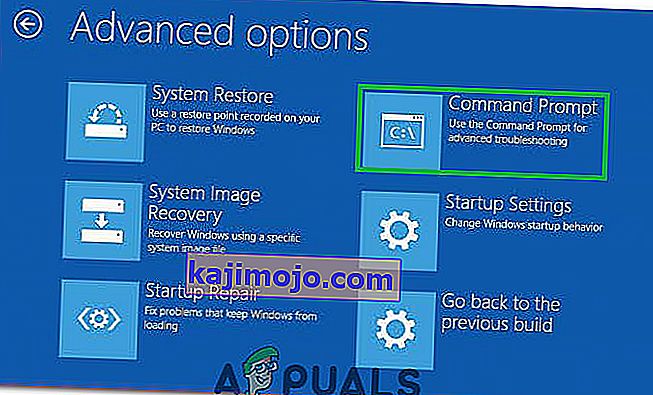
- In giderme ekranından tıklayın Gelişmiş Seçenekler, ve üzerine tıklayın İstemi Komutanlığı.
- Komut İstemi açıldığında, aşağıdaki komutları yazın ve her birinin ardından klavyenizdeki Enter tuşuna basın :
bootrec / scanos bootrec / fixmbr bootrec / fixboot bootrec / rebuildbcd
- Bilgisayarınızı yeniden başlatın ve sorunla tekrar karşılaşmadan iyi bir şekilde başlatılmalıdır.

Yöntem 2: İşletim sisteminizi kurtarma sürücüsüyle onarın
Bu yöntem, işletim sisteminizi kurtarma sürücüsünün komut istemiyle de onaracaktır ve sorunla tekrar karşılaşmadan Windows'a önyükleme yapabilmelisiniz. Kurtarma sürücüsünden önyükleyin ve aşağıdaki talimatları izleyin.
- Kurtarma sürücüsünün Komut İstemi'ne gitmek için önceki yöntemden 1 ile 3 arasındaki adımları kullanın .
- Komut İstemi'ne girdikten sonra, aşağıdaki komutları yazın ve bunları yürütmek için klavyenizde bir Enter tuşuna basın. StartRep.exe yarar önyükleme ortamı değerlerini düzeltir ve BCD hatayı düzeltmek gerekir. Başarısız olması durumunda bu adımı birçok kez tekrarlamanız gerekebileceğini unutmayın.
cd x: \ sources \ kurtarma StartRep.exe
- Önceki Windows onarım adımı yardımcı olmadıysa , Windows Önyükleme Yöneticisinin değerlerini görmek için Komut İstemi'ne bcdedit yazın .
- Cihaz için değerleri not edin . Onlar ise bilinmeyen bir takip her aşağıdaki komutları yazın girin bunları yürütmek için. Gerekirse, C: 'yi işletim sisteminizin kurulu olduğu bölümle değiştirmeniz gerektiğini unutmayın .
bcdedit / set {DEFAULT.EN_US} aygıt bölümü = c: bcdedit / set {DEFAULT.EN_US} osdevice bölümü = c: bcdedit / set {BOOTMGR.EN_US} aygıt bölümü = c:- Komut İstemi tamamlandığında, kapatın, kurtarma sürücüsünü çıkarın ve sisteminizi yeniden başlatın. Şimdi önyükleme konusunda herhangi bir sorun olmamalı.
Bu çözümlerin tek dezavantajı, bir kurtarma sürüşü, sabır ve güçlü sinirler gerektirmeleridir. Ancak bunları anlatıldığı gibi takip ederseniz, aldığınız hatayı düzeltmeli ve cihazınızı eskisi gibi kullanmaya devam etmelisiniz.
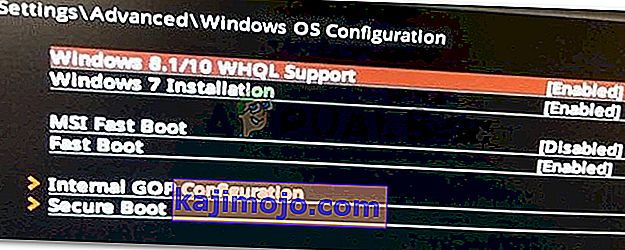
Yöntem 3: BIOS'ta Windows 10 WHQL Desteğini Etkinleştirin
Windows 10 WHQL Desteği ayarı bazı OEM'lerde mevcuttur. İki temel işlevi vardır: önyükleme işlemi sırasında imzalı sürücüleri kontrol eder ve UEFI desteğini etkinleştirmenize izin verir. Windows 10 kullanıyorsanız, etkinleştirmeniz gerekir ve ardından bilgisayarınız normal şekilde önyüklenebilir. Ancak, seçilmezse, bilgisayarınız 0xc000000e hatasıyla önyüklenebilir. Böylece, Windows 10 WHQL Desteği ayarının etkin olup olmadığını görmek için BIOS'a erişebilirsiniz. Değilse, denemek için etkinleştirin.
Windows 10 WHQL Desteği ayarının tüm bilgisayarlarda desteklenmediğini unutmamalısınız. Bilgisayarınızda yoksa, bilgisayarınızda UEFI desteğinin etkin olup olmadığını kontrol edebilirsiniz. Değilse, 0xc000000e hata kodunun kaybolup kaybolmadığını görmek için etkinleştirebilirsiniz. Etkinleştirmek için:
- Bilgisayarınızı tamamen kapatın ve en az birkaç dakika bekletin.
- Yeterli zamanın geçtiğinden emin olduktan sonra, bilgisayarı yedeklemeye başlayın ve “ Bios Moduna başlatmak için bu Düğmeye basın ” seçeneğini fark etmelisiniz .
- Bios moduna geçmek için düğmeye basın.
- Bios modunda başarılı bir şekilde önyükleme yaptıktan sonra, Bios'ta bir Windows WHQL ayarı olup olmadığını kontrol edin.
- Varsa , ok tuşlarını kullanarak vurguladıktan sonra seçmek için "Enter" tuşuna basın ve bilgisayarınızda etkinleştirmek için "Etkin" seçeneğini seçin .
- Bunun sorunu çözüp çözmediğini kontrol edin .

Windows 10 WHQL Desteği ayarını veya UEFI desteğini etkinleştirdikten sonra Windows 10 önyükleme hatası 0xc000000e hala görünüyorsa, bilgisayarınızdaki BIOS / UEFI yapılandırmasını sıfırlamanız gerekebilir.
Yöntem 4: Easy Recovery Essentials aracılığıyla BCD'yi yeniden oluşturun
Easy Recovery Essentials, Windows'un hata nedeniyle önyükleme yapmadığı durumlarda bile, "0xc000000e" hatasını çözmek için BCD'nin tam onarımını ve yeniden yapılandırmasını içeren tek tıklamayla otomatikleştirilmiş bir sistem onarım özelliğidir.
EasyRE'nin otomatik önyükleme onarım bileşeni, BCD ile ilgili tüm sorunları ele alır, BCD'yi düzeltir veya düzgün şekilde yüklenmeyi reddeden bölüm için doğru kodlamayı ve yolu kullanarak sıfırdan yeniden oluşturur. Ayrıca, düzgün çalıştığından emin olmak için diski çevrimiçi olarak işaretler.
Easy Recovery Essentials'ın, yerleşik Otomatik Onarım seçeneğini kullanarak "0xc000000e" hatasını otomatik olarak düzeltmesi garanti edilir. EasyRE şu anda Windows XP, Vista, 7, 8, 10 için mevcuttur ve herhangi bir PC'ye indirilebilir ve oluşturulabilir.
- Bilgisayarı önyüklemek için kullanacağımız bir USB oluşturmak için kullanabileceğiniz başka bir bilgisayara sahip olun.
- Easy Recovery Essentials'ı buradan indirin.

- Görüntüyü yak.
- Bilgisayarınızı, oluşturduğunuz Easy Recovery Essentials CD'sinden veya USB'den başlatın.
- Once EasyRE is running, choose the “Automated Repair” option and click Continue.
- After EasyRE scans your computer’s drives, identify and select the drive letter for your Windows installation from the list, and then click on the Automated Repair Option to begin.
- Easy Recovery Essentials will start analyzing the selected drive for problems. EasyRE will test for and attempt to automatically correct errors with the disk, partition, bootsector, filesystem, bootloader, and registry. No intervention is required, as EasyRE’s repair is fully automated.
- Once the process is complete, EasyRE will report its findings. Click on the Restart button to reboot your PC and test the changes.

Method 5: Reset BIOS/UEFI Configuration
Some users said that their error 0xc000000e issue is solved by resetting the BIOS/UEFI configuration. So, you can consider trying this method to see whether this issue can be solved.
Step 1. Open BIOS Menu
To reset BIOS to default settings, you need to access the BIOS menu and find the Default Settings option first.
Windows 10 users can access advanced startup options Windows 10 and get into the BIOS menu. You can click Start -> Power, press and hold the Shift key, and click Restart button to reboot Windows into Windows Recovery Environment. Then click Troubleshoot -> Advanced Options -> UEFI Firmware Settings, and click Restart to enter into the BIOS settings screen.
Alternatively, you can also restart your computer normally and press the required key in the startup screen to boot into the BIOS settings window. The hotkey is varied from different computer manufacturers, and it could be F12, Del, Esc, F8, F2, etc.
Step 2. Find the Setup Defaults Option
The name and location of the “Setup Defaults” option may be different from various computers. It generally calls like: Load Default, Load Setup Defaults, Load Default Settings, Load BIOS Defaults, Load Optimal Defaults, etc.
Use the arrow keys on the computer keyboard to find the BIOS setup default option in the BIOS settings screen. You may find it in one of the BIOS tabs.
Step 3. Reset BIOS
After you find the Load Setup Defaults option, you can select it and press the Enter button to start resetting the BIOS to factory default settings in Windows 10.
At last, you can press F10 to save and exit BIOS. Your computer will automatically reboot. If you need to change BIOS settings again in the future, you can follow the same instructions to access BIOS again to change it.
Method 6: Mark Boot Disk As Online
It is possible in some cases, that the disk that you have connected to the computer or the USB that you are trying to boot from has been marked as offline by the computer. Some computers tend to prevent extra applications, hardware, and other things from being able to run as soon as the computer starts because it allows for more convenient and fast startup experience. Therefore, in this step, we will be marking the Disk as online.
You still need to use a bootable USB medium to do this job. We will show you a step-by-step guide here:
- After booting your computer from the bootable USB drive, you need to go to Next > Repair your computer. Then, you will enter WinRE.
- Go to Troubleshoot > Advanced options > Command Prompt.
- Make sure to properly enter your login credentials if you are asked by the computer.
- Type in the following command inside the command prompt to successfully launch the disk part utility on your computer.
diskpart
- Type in either one of the following commands in the next window to list the currently connected disk drives to your computer.
List Disk List Volume
- Once the disks have been listed, you need to identify the disk that contains the Windows operating system and the one that you want to mark as active.
- After identifying it, select the disk using the following command and replacing the alphabet with the driver letter of that disk.
select disk A Select Volume A (Replace A with the Drive Letter)
- After you have successfully selected the disk, you must mark the disk as online in order to initiate the recognization process of the disk at startup. Use the following commands to do that.
Online Disk Online Volume
- Type in the following command to successfully get out of the command prompt and restart your computer after that.
Exit
- Check to see if marking the Disk as online has fixed your issue.

Method 7: Check your data cables, BIOS and drivers
Unplug all HDD data cables, and then plug them again. Revert to the previous drivers and BIOS settings if they were changed, or use “Restore factory settings” option in the BIOS. Make sure to write down all current BIOS settings that were previously selected, just in case it is required to switch back. If the error is caused by a change of the SATA disk controller’s mode in the BIOS or firmware, the fix can be as simple as entering the BIOS and toggling the SATA controller’s “mode” setting. The exact instructions differ from one manufacturer to the other, but the options will resemble what is shown in the screenshots below.
To check the boot order, follow these steps:
- Restart the computer
- Press the necessary key to open the BIOS menu. This key depends on the computer manufacturer and computer model. This is usually listed on the first screen that appears on the monitor. It can be any of the following: Esc, Del, F2, F8, F10 or F12.
- If the screen shows multiple keys, find the key to open “BIOS”, “setup” or “BIOS menu”
- Attempt to toggle between all three (or more) modes until a combination that results in Windows booting successfully once more is found.
Method 8: Boot Windows In Safe Mode
If above solutions didn’t fix the problem, then Start Windows into safe mode. This will start your PC with minimum system requirements, will not load startup programs, add-ons etc. And allow performing troubleshooting steps to fix Boot Error 0xc000000e:
Before you enter the safe mode, you need to enter the Windows Recovery Environment (winRE). To do this, you will repeatedly turn your device OFF, then ON:
- Hold down the power button for 10 seconds to turn off your device.
- Press the power button again to turn on your device.
- On the first sign that Windows has started (for example, some devices show the manufacturer’s logo when restarting) hold down the power button for 10 seconds to turn off your device.
- Press the power button again to turn on your device.
- When Windows restarts, hold down the power button for 10 seconds to turn off your device.
- Press the power button again to turn on your device.
- Allow your device to fully restart and you should boot into the Windows Recovery Environment.
Now that you are in the Windows Recovery Environment, you will follow these steps to take you to safe mode:
- On the Choose an option, screen, select “Troubleshoot” and then “Advanced options.”

- Now click on “Startup Settings” and click on “Restart.”
- After your device restarts, you’ll see a list of options. Select option “4” from the list or press “F4” to enter Safe Mode.

Note: If you need to exit safe mode, simply restart your device, or:
- Press the “Windows logo key + R.”
- Type “msconfig” in the Run box and then select “OK”.
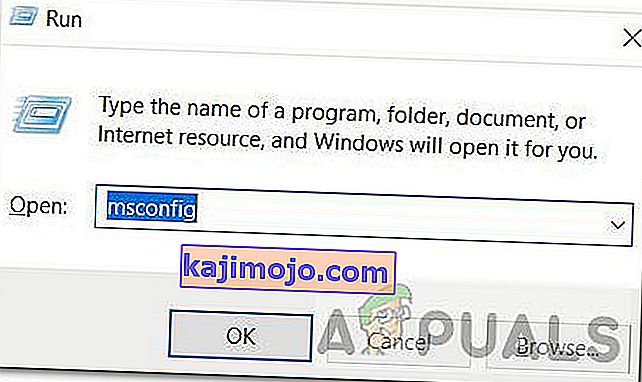
- Select the Boot tab and under Boot options, clear the Safe boot checkbox.

Method 9: Check your disk with CHKDSK utility
If the hard drive has its file integrity compromised, it is possible to use built-in Windows CHKDSK utility to scan the disk and fix the file system errors.
- Connect a USB drive that has been made bootable or insert the Windows Installation Disk on your computer.
- After connecting one of these, boot from that connected device.
- After booting your computer from the device, click on “Next” and then on the “Repair your Computer” option.
- On the next window, click on “Troubleshoot” and then on the “Advanced” Option.

- On the next screen, make sure to select the “CommandPrompt” option to successfully launch into the command prompt.
- Provide the login credentials of your account in order to boot inside the cmd.
- Inside the command prompt, type in the following command to successfully run the check disk utility on your computer.
chkdsk C: /f (Make sure to replace the "C" with the Drive letter of your partition).
- Confirm any on-screen prompts and wait for the scan to be fully completed.
- Check to see if the issue is fixed by performing this step.
Method 10: Disable fast startup Feature
If your computer has been set up to use the Fast Startup feature, you might be getting this error message on your screen because of doing so. The Fast Startup feature is known to malfunction with some operating systems and hardware combinations.
Basically, when enabled, the feature automatically sends some launch configurations to be stored in your RAM to allow for a faster startup as indicated by its name but this configuration data can sometimes be corrupted which can lead to this error on your computer. Therefore, in this step, we will be disabling it completely. For that:
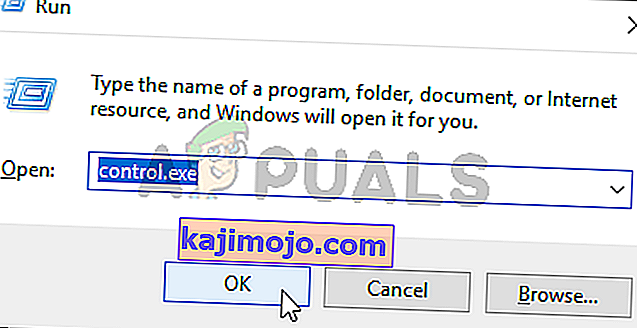
- Press “Windows” + “R” to open the Run prompt.
- Type in “Control Panel” and press “enter” to launch the classical Control Panel interface.
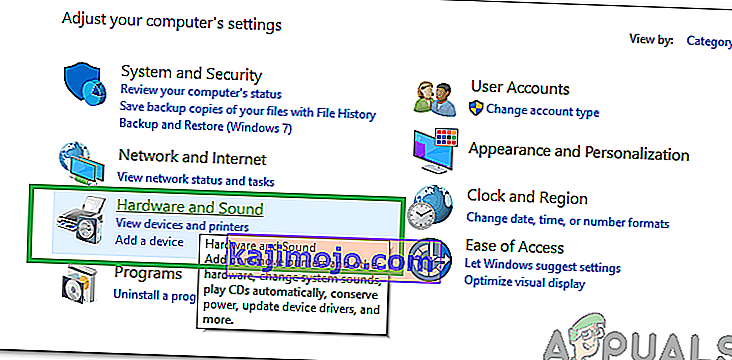
- Inside the control panel, click on the “Hardware and Sound” option and then select the “Power Options” button.
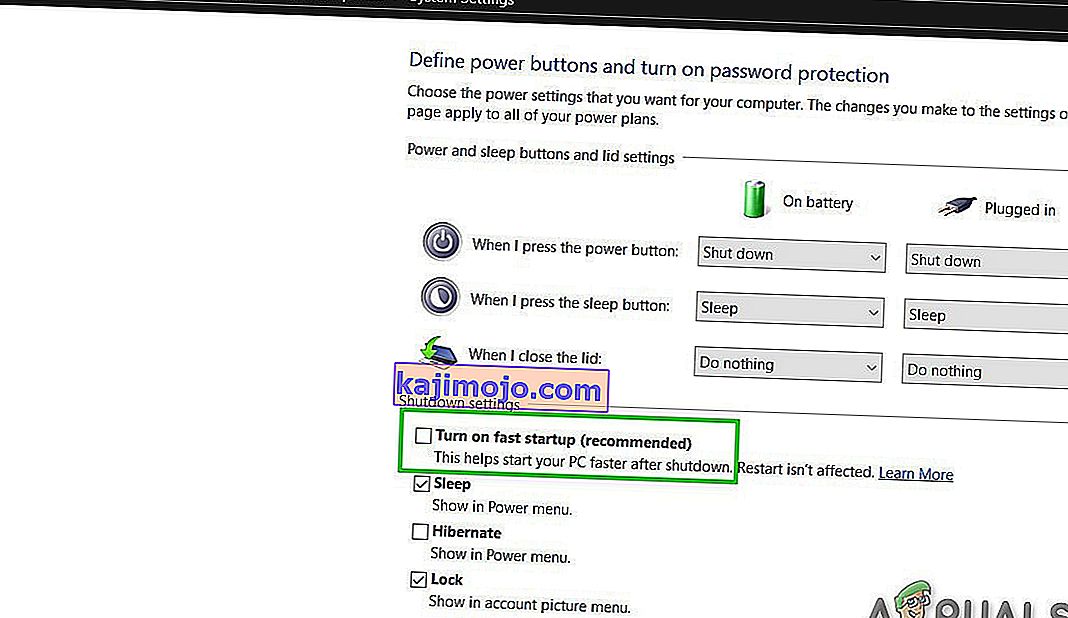
- Inside the power options, click on the “Choose what the power button does” from the left side.
- Click on the “Change Settings” option if the fast startup option is greyed out.
- Make sure to uncheck the “Turn on Fast Startup” option and save your changes.
- Closeout of the window and terminate any unnecessary applications.
- Click on the “Start Menu”, click on the “Power Options” and select “Shutdown” from the list.
- This option should completely power down your computer and after performing a complete shutdown, wait for some minutes before turning your computer back on.
- After the computer turns back on, check to see if the error message is fixed.
Note: This solution can only be applied if you are able to sometimes boot up your computer normally and are only encountering this error momentarily.


Method 11: Repair Corrupted System Files
It also possible in some situations that certain system files might have been corrupted due to a storage failure or due to some other reason. Therefore, in this step, we will be performing a complete repair of the corrupted system files and then we will check to see if doing so fixes this issue. For that:
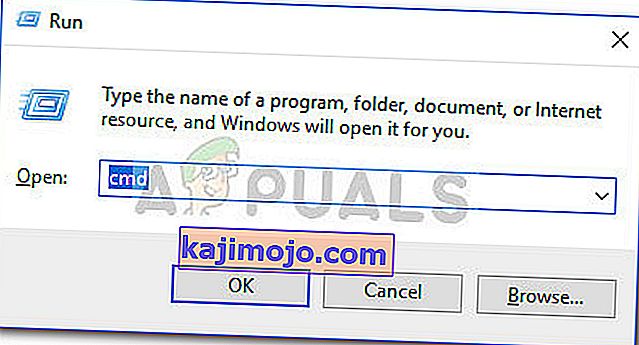
- Press “Windows” + “R” to open the Run prompt.
- Type in “cmd” and then press “Shift” + “Ctrl” + “Enter” to launch the command prompt with admin privileges.
- Type in the following commands one by one and press “Enter” after each to successfully run an SFC scan and a DISM Scan on your computer.
DISM /Online /Cleanup-Image /RestoreHealth sfc /scannow
- Restart your computer completely once these scans are completed.
- Check to see if by performing these scans, you were able to fix this issue on your computer.

Method 12: Run Windows Startup Repair
Startup Repair is capable of diagnosing and fixing the found issues. For example, it can automatically scan system files, registry settings, configuration settings, etc. and try to fix the problem on its own. Startup Repair is especially useful when your computer is unbootable. Since your computer fails to boot, Windows can boot into WinRE automatically. While, if it doesn’t appear, you can interrupt the boot process three times in a row, and then the WinRE screen appears. Alternatively, if you have a bootable USB medium, you can also set your computer to boot from it and go to Repair your computer to enter WinRE.
After you have successfully booted into the Windows Recovery Environment, click on the “Troubleshoot” option, and from there, select the “Advanced Options” screen. Inside the advanced options, select the “StartupRepair” button to successfully initiate the Startup Repairing process. Windows will begin to diagnose your computer automatically. When the process ends, your computer will restart automatically. You can wait to see whether it can boot successfully.

Çözüm: Komut satırına veya Başlangıç Onarma'ya atlamadan önce hiçbir ek aygıtın takılı olmadığından emin olun, en az sayıda aygıt ve bilgisayara takılı harici sürücü ile başka bir yeniden başlatmayı denemek en iyisidir. Bu, bilgisayara yakın zamanda eklenen hiçbir şeyin bu soruna neden olmadığından emin olmanızı sağlayacaktır. En iyisi, en son USB sürücülerini, CD'leri, DVD'leri vb. Çıkarmaktır. Buna bir bellek kartı okuyucusu da dahildir. Tüm harici sürücülerin ve USB anahtarlarının veya USB atlama sürücülerinin bağlantısının kesildiğinden emin olun ve ardından tekrar deneyin.