" * Uygulama_adı * ' nda işlenmeyen bir win32 istisnası oluştu " hatası, genellikle kullanıcı Visual Studio'da yerleşik bir uygulamayı başlatmaya çalıştığında ortaya çıkar. Bu hatanın bildirilen çoğu örneği, Uplay, Internet Explorer ve başlangıçta eski Windows sürümleri için oluşturulmuş birkaç Eski oyunla ilişkilidir.

Not : Visual C ++ ile ilgili bir Çalışma Zamanı Kitaplığı'nın nasıl düzeltileceği aşağıda açıklanmıştır.
Windows'ta "Uygulamanızda İşlenmeyen Özel Durum Oluştu" Hatasına Neden Olan Nedir ?
Bu sorunun birkaç basit nedeni vardır ve senaryonuzu yalnızca doğru nedeni belirlemeye dayalı olarak tanıyabilirseniz, sorun etkili bir şekilde çözülebilir. Aşağıdaki listeye göz atın:
- Virüsten koruma yazılımınız suçlu olabilir - Panda Antivirus gibi bazı virüsten koruma araçlarının bu soruna neden olduğu bilinmektedir, bu nedenle bunları değiştirdiğinizden emin olun.
- Belirli programlar veya kötü amaçlı yazılımlar çalışıyor olabilir - Bilgisayarınızda yüklü bir program veya kötü amaçlı yazılım çalışıyorsa, ondan kurtulmak isteyebilirsiniz. Bunun doğru neden olup olmadığını görmek için temiz önyüklemeye başladığınızdan emin olun.
- Microsoft .NET Framework yüklemesi bozuk - Çekirdek dosyaları bozuksa, yüklemesini onarmayı, daha yeni bir sürümü yüklemeyi veya bir SFC taraması yapmayı deneyebilirsiniz.
- Komut dosyası hata ayıklaması Kayıt Defteri aracılığıyla etkinleştirilir - Görünüşe göre, belirli bir kayıt defteri anahtarı bu sorunun ortaya çıkmasına katkıda bulunabilir. Bununla ilgilenmek için, Kayıt Anahtarları Aracılığıyla Komut Dosyası Hata Ayıklamayı devre dışı bırakmanız gerekir.
- Msvcr92.dll'de erişim ihlali - Kaynak arabelleğinin aşılması veya uygun olmayan son bayt da bu sorunun olası nedenleridir. Bunları ele almak için, bekleyen her Windows güncellemesini yüklemeniz gerekecek.
- Ubisoft başlatıcı kayıt defteri anahtarını silme - Uplay.exe'yi başlatmaya çalışırken bu hatayı görürseniz, bunun nedeni Ubisoft Oyun Başlatıcı'daki bir hatadır. Bu sorun, bu başlatıcıya ait değer silinerek kayıt yoluyla da çözülebilir.
- Sistem dosyası bozulması - Bir sistem dosyası tutarsızlığı da bu sorunu yaratabilir. Işık bozulması, basit DISM ve SFC taramaları ile çözülebilir. Daha ağır koşullarda, temiz bir kurulum veya onarım kurulumu, sorunu çözmenize yardımcı olacaktır.
1.Çözüm: Bekleyen her Windows Güncellemesini yükleyin
" İşlenmemiş bir win32 istisnası oluştu " hatasına neden olacak en yaygın nedenlerden biri , x64 platformu için MSVCR90.DLL kullanılarak oluşturulmuş ve strncpy işlevini çağıran bir uygulamadır.
Bu durumda, Msvcr92.DLL dosyasında tetiklenen bir erişim ihlali , büyük olasılıkla uygulamanın strncpy işlevinde yanıt vermeyi durdurmasına neden olur. Aşırı bir kaynak arabelleği veya uygun olmayan bir son bayt, bu sorunun en olası nedenleridir.
Neyse ki, Microsoft bu sorunun farkındadır ve bu sorun için otomatik olarak çözecek bir düzeltme yayınlamıştır. Bundan yararlanmak için tek yapmanız gereken, işletim sistemi sürümünüzü mevcut en son sürüme güncellemektir.
Not: Bu düzeltme, Windows'un otomatik olarak güncellediği bir Visual Studio 2008 revizyonunda yayınlanmıştır, bu nedenle aşağıdaki adımlar evrenseldir ve işletim sistemi sürümünüzden bağımsız olarak çalışmalıdır.
Visual Studio 2008 için düzeltmeyi yüklemek ve sorunu çözmek için Windows derlemenizi en son sürüme güncellemeyle ilgili hızlı bir kılavuz:
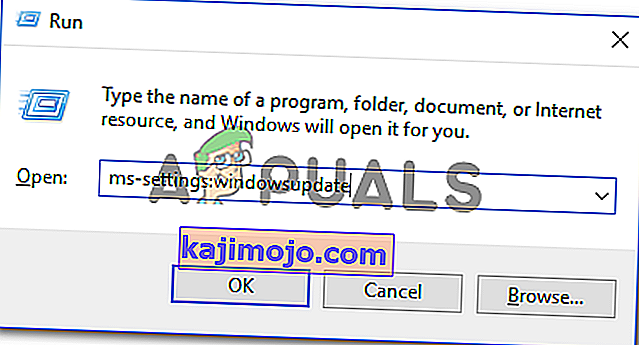
- Çalıştır iletişim kutusunu açmak için Windows tuşu + R tuşlarına basın . Ardından, 'ms-settings: windowsupdate' yazın ve Ayarlar uygulamasının Windows güncelleme sekmesini açmak için Enter tuşuna basın .
Not: Windows 7 veya Windows 8.1'de bu sorunla karşılaşırsanız. kullanmak 'wuapp' yerine komutu.
- Windows Update ekranına girmeyi başardıktan sonra, Güncellemeleri kontrol et seçeneğine tıklayarak başlayın . Ardından, şu anda kurulmayı bekleyen her Windows Update'in kurulumunu tamamlamak için ekrandaki komut istemlerini izlemeye başlayın .

Not: Yalnızca kritik olanları değil, her güncellemeyi yüklemenizin çok önemli olduğunu unutmayın. Düzeltme Visual Studio'nun bir revizyonunda yer aldığından, söz konusu güncelleştirmeyi İsteğe Bağlı altında bulabilirsiniz, bu nedenle hepsini yüklediğinizden emin olun.
- Mevcut her güncellemeyi yükleme şansınız olmadan önce yeniden başlatmanız istenirse, bunu yapın. Ancak güncellemelerin geri kalanının kurulumunu tamamlamak için bir sonraki başlatma tamamlandıktan sonra aynı ekrana geri döndüğünüzden emin olun.
- Bekleyen her güncelleme yüklendikten sonra, bilgisayarınızı son bir kez yeniden başlatın ve ardından sorunun giderilip giderilmediğini görmek için daha önce hata mesajına neden olan işlemi tekrarlayın.


Hala " İşlenmemiş bir win32 istisnası oluştu " hatasıyla karşılaşıyorsanız, aşağıdaki sonraki yönteme geçin.
2.Çözüm: Antivirüsünüzü Değiştirin
Ücretsiz antivirüs araçları oldukça yardımcı olabilir ve bilgisayarınızı korumak için işlerini yapabilirler, ancak bazen bilgisayarınızdaki diğer şeylerle iyi anlaşamazlar. Açıkken bu soruna neden oluyorsa antivirüsünüzü değiştirmeyi düşünün!
- Başlat menüsüne tıklayın ve arayarak Denetim Masası'nı açın . Alternatif olarak, Windows 10 kullanıyorsanız ayarları açmak için dişli simgesine tıklayabilirsiniz.
- Denetim Masası'nda, sağ üst köşedeki Farklı Görüntüle - Kategori'yi seçin ve Programlar bölümünün altındaki Program Kaldır'ı tıklayın .

- Ayarlar uygulamasını kullanıyorsanız, tıklayarak Apps hemen PC'nizdeki tüm yüklü programların listesini açılmalıdır.
- Virüsten koruma aracınızı Denetim Masası veya Ayarlar'da bulun ve Kaldır'a tıklayın .
- Kaldırma sihirbazı açılmalıdır, bu yüzden kaldırmak için talimatları izleyin.

- Kaldırma programı işlemi tamamladığında Bitir'i tıklayın ve hataların hala görünüp görünmeyeceğini görmek için bilgisayarınızı yeniden başlatın. Daha iyi bir antivirüs seçeneği seçtiğinizden emin olun .
3. Çözüm: Başlatıcı Kayıt Defteri değerini silme (varsa)
Eğer “karşılaşıyorsanız Işlenemeyen win32 durum oluştu Uplay.exe veya Ubisoft ait farklı bir uygulama başlatmaya çalışırken 'hatası, bunun nedeni onların Ubisoft Oyun Launcher ile bir hatadan dolayıdır.
Görünüşe göre bu, Windows 10'da, özellikle aynı anda hem Steam hem de Uplay'in yüklü olduğu kullanıcılar arasında yaygın bir sorun gibi görünüyor.
Bu sorunu çözmek için mücadele ettiğimiz birkaç etkilenen kullanıcı, başlatıcıya ait dize kayıt defteri değerini bulmak ve silmek için Kayıt Defteri Düzenleyicisi'ni kullanarak sorunu düzeltmeyi başardı. Bu, sözde çatışmayı ortadan kaldırarak her iki uygulamanın da aynı makine altında düzgün çalışmasına izin verir.
Uplay başlatıcısı ile ilişkili Kayıt defteri değerini silme konusunda hızlı bir kılavuz:
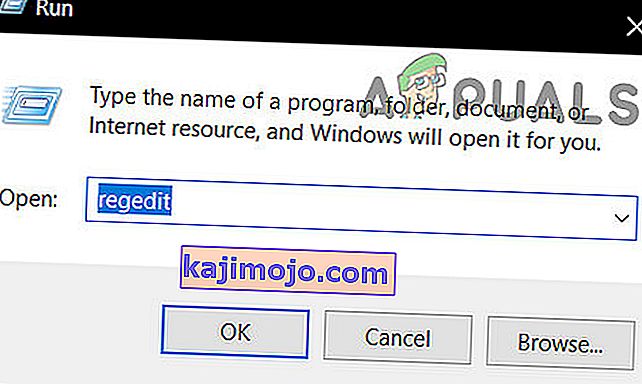
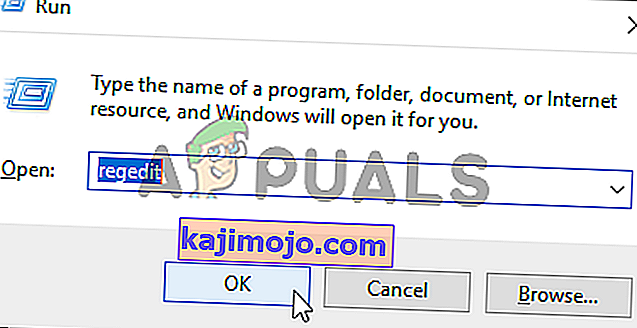
- Çalıştır iletişim kutusunu açmak için Windows tuşu + R tuşlarına basın . Metin kutusunun içine 'regedit' yazın ve Kayıt Defteri Düzenleyicisini açmak için Enter tuşuna basın . UAC (Kullanıcı Hesabı Denetimi) istemi tarafından istendiğinde , yönetici ayrıcalıkları vermek için Evet yazın .
- Once you’re inside the Registry Editor, use the left-hand side section of the window to navigate to the following location:
Computer\HKEY_LOCAL_MACHINE\SOFTWARE\WOW6432Node\Ubisoft
Note: You can either navigate there manually or you can paste the location directly into the navigation bar at the top and press Enter to get there instantly.
- After you manage to land in the correct location, move down to the right-hand section of the screen, right-click on Launcher and choose to Delete to get rid of it.

Note: In case you can delete the key, here’s how to take ownership of registry keys.
Note: After you delete it, the launcher will be forced to create a new Launcher string value with fresh data, which should resolve the issue.
- Once the key has been deleted, close Registry Editor and restart your computer.
- At the next computer startup, repeat the action that was previously causing the “An unhandled win32 exception occurred‘ error and see if the problem is resolved.


In case the same issue is persisting, move down to the next potential fix below.
Solution 4: Reset Internet Explorer (if applicable)
Another potential instance with the potential of creating this issue is a series of corrupted Internet Explorer (IE). If you’re encountering the “An unhandled win32 exception occurred in iexplore.exe’ error chances are it appears after a failing script.
To fix this issue, you should reset your Internet Explorer settings via the Internet Options menu. This operation was confirmed to be successful by a lot of users that were dealing with this error.
Here’s a quick guide on resetting Internet Explorer in order to resolve the “An unhandled win32 exception occurred‘ error:
- Ensure that Internet Explorer, Edge or any other associated instance is turned off and no background process is running.
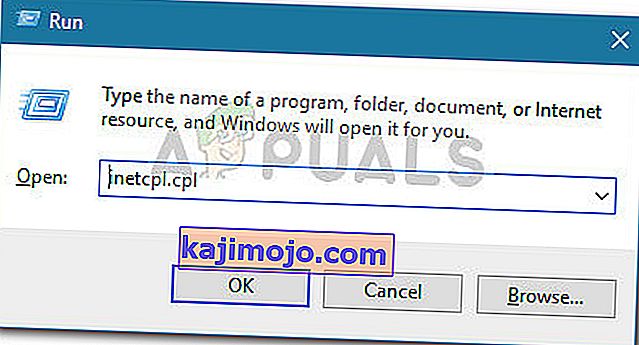
- Press Windows key + R to open up a Run dialog box. Inside the text box, type ‘inetcpl.cpl’ and press Enter to open up the Internet Options menu.
Note: If you are prompted by the UAC (User Account Control), click Yes to grant administrative privileges.
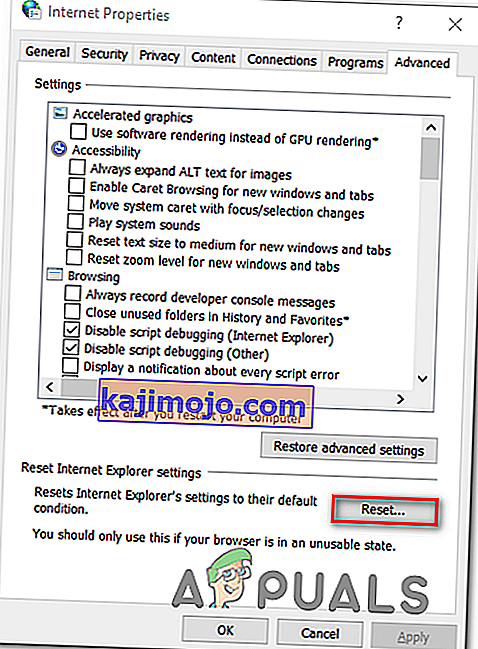
- After you manage to get inside the Internet Properties screen, select the Advanced tab from the horizontal menu at the top. Next, go to the Reset Internet Explorersettings and click on the Reset button.
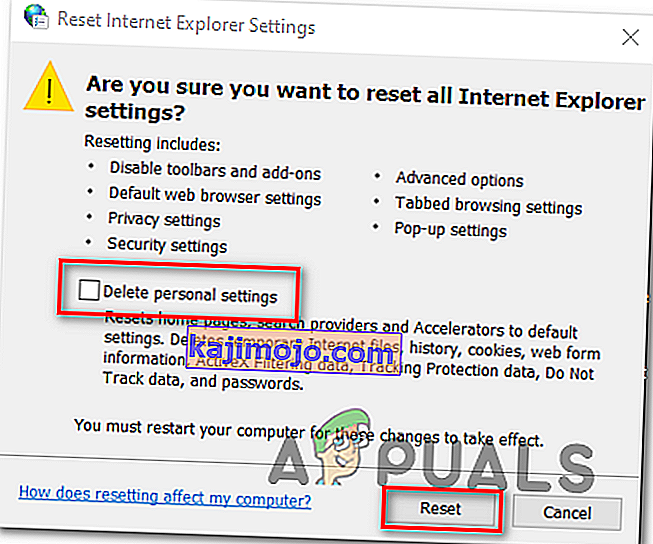
- Once you see the confirmation screen, ensure that the box associated with Delete personal settings is checked, then click on the Reset button.
- Wait until the operation is complete, then restart your machine and see if the issue is resolved at the next computer startup.


In case the same “An unhandled win32 exception occurred in iexplore.exe’ error is still occurring, move down to the next method below.
Solution 5: Disable Script Debugging and associated Registry Keys (if applicable)
If you’re encountering the issue with Internet Explorer on a machine that has VS installed on it, the issue can also occur due when Script Debugging is enabled and the registry entries end up containing corrupted data.
Several affected users that encountered this issue have confirmed that the issue was resolved after they accessed the Internet Options menu to disable Script Debugging and then deleted the associated keys using Registry Editor.
Here’s a quick guide on doing this in order to fix the “An unhandled win32 exception occurred in iexplorer.exe’ error:
- Press Windows key + R to open up a Run dialog box. Next, inside the text box, type ‘inetcpl.cpl’ and press Enter to open up the Internet Options menu. If you are prompted by the User Account Control (UAC), click Yes to grant administrative privileges.

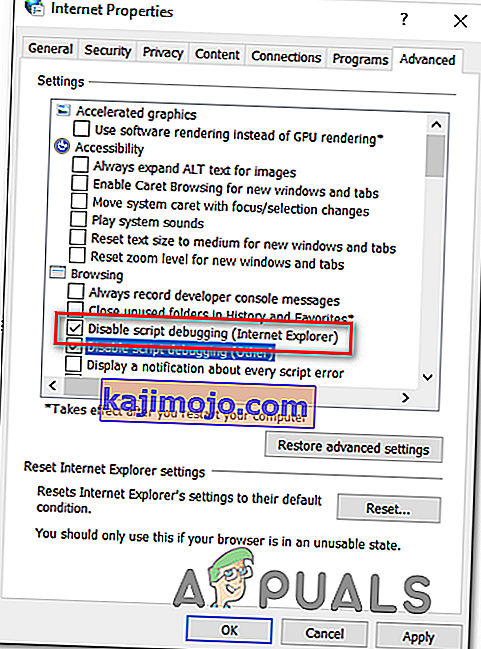
- Once you manage to find yourself inside the Internet Properties screen, use the menu at the top to select the Advanced tab.
- Inside the Internet Properties screen, scroll down through the Settings menu and check the box associated with Disable script debugging (Internet Explorer).
- Once the modification is enforced, hit Apply to save the changes, then close the Internet Properties window.
- Press Windows key + R once again to open up another dialog box. This time, type ‘regedit’ and press Enter to open up Registry Editor. You will need to grant admin access, so click Yes when prompted by the User Account Control window.
- Inside the Registry Editor, navigate to the following location using the left-hand menu:
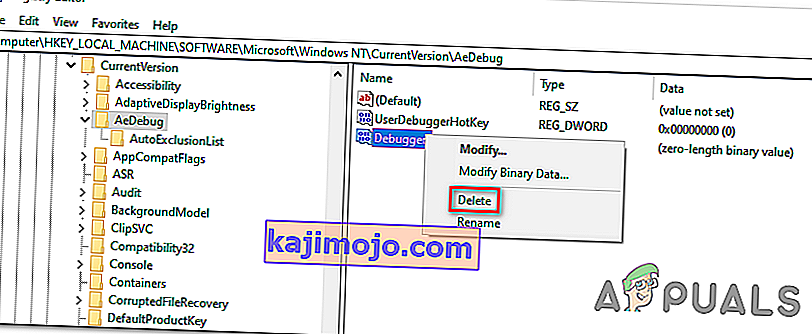
HKEY_LOCAL_MACHINE\SOFTWARE\Microsoft\Windows NT\CurrentVersion\AeDebug (32 - Bit Machine) HKEY_LOCAL_MACHINE\SOFTWARE\Wow6432Node\Microsoft\Windows NT\CurrentVersion\AeDebug (64 - Bit Machine)
Note: The location of the file we need to delete is different depending on the Windows version that you’re using. If you have a 32 – bit Windows version use the first location, else, use the second.
- Once you arrive to the correct location, move down to the right-section, right-click on Debugger and choose Delete from the context menu.
- Once this key is deleted, navigate to this second location:
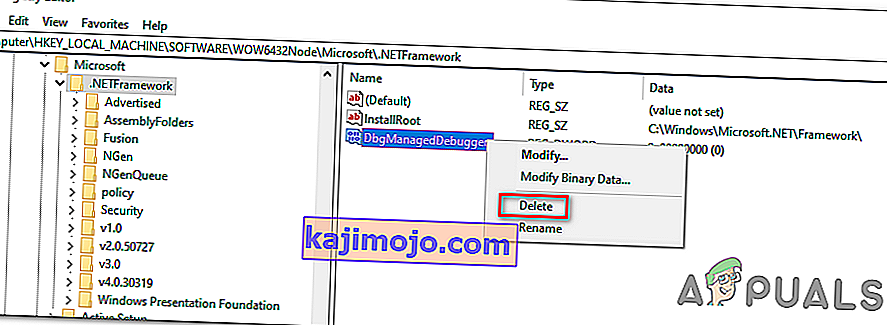
HKEY_LOCAL_MACHINE\SOFTWARE\Microsoft\.NETFramework\ (32 - Bit Machine) HKEY_LOCAL_MACHINE\SOFTWARE\Wow6432Node\Microsoft\.NETFramework (64 - Bit Machine)
Note: Access the registry key associated with your Windows bit version that you’re using.
- When you arrive at the correct location, move over to the right-hand section and delete the DbgManagedDebugger value by right-clicking on it and choosing Delete from the context menu.
- After you manage to delete the value, close the Registry Editor and restart your computer.
- Once the next startup is complete, see if the same issue is still occurring.


In case the “An unhandled win32 exception occurred’ error is still occurring, move down to the next method below.
Solution 6: Install the Latest Version of NET Framework and Repair it
Having NET Framework installed on your computer is vital and plenty of modern games and programs depend on you having it installed. Before repairing it, follow the steps below in order to install the latest version on your computer.
Navigate to this link and click the red download button in order to download the latest version of the Microsoft .NET Framework. After the download has finished, locate the file you downloaded and run it. Note that you will need to have constant access to the Internet. Follow the instructions on-screen to proceed with the installation.
- After installing the latest version, it’s time to check its integrity. On your keyboard, use the Windows Key + R key combination to open the Run dialog box.
- Type in control.exe and click OK in order to open it.

- Click the Uninstall a Program option and click Turn Windows features on or off. Make sure you locate the .NET Framework 4.x.x entry and make sure it’s enabled. ‘x.x’ marks the latest version available for your operating system.
- If the checkbox next to .NET Framework 4.x.x is not enabled, enable it by clicking the box. Click OK to close the Windows Feature window and reboot the computer.

- If .Net Framework 4.x.x is already enabled, you can repair .Net Framework by clearing the box and rebooting the computer. After the computer has restarted, re-enable .Net Framework and restart the computer again.
Solution 7: Perform a Clean Boot
There are various other programs and services which can affect the proper functionality of the Microsoft .NET Framework suite. In most cases, the cause is the antivirus you have installed and you can try disabling it to see if the error persists. However, to make sure nothing can interfere with the installation, we recommend you perform a clean boot which will disable all non-Microsoft programs and services from starting up. This way, you can easily deduct just which program causes this error to happen!
- Use the Windows + R key combination on your keyboard. In the Run dialog box type MSCONFIG and click OK.
- Click on the Boot tab and uncheck the Safe Boot option (if checked).

- Under the General tab in the same window, click to select the Selective startup option, and then click to clear the Load startup items check box to make sure it’s not checked.
- Under the Services tab, click to select the Hide all Microsoft services check box, and then click Disable all.

- On the Startup tab, click Open Task Manager. In the Task Manager window under the Startup tab, right click on each startup item which is enabled and select Disable.

- After this, you will need to perform some of the most boring processes and that is enabling the Startup items one by one and restarting your computer. After that, you need to check whether the problem appears again. You will need to repeat the same process even for the Services which you have disabled in Step 4.
- Once you locate the problematic startup item or service, you can undertake action in order to solve the problem. If it is a program, you can reinstall it or repair If it is a service, you can disable it, etc.
Solution 8: Use SFC to Scan for Memory Leaks
It has been reported that the Microsoft .NET Framework corruption is related to faulty system files. These problems are rooted deep inside the system files and the only way to try to resolve them is by running the System File Checker (SFC). It will scan your system files for errors and possible repair or replace them. Follow the steps below in order to do so!
- Search for “Command Prompt” by typing it either right in the Start menu or by pressing the search button right next to it. Right-click the first entry which will pop up as a search result and select the “Run as administrator” context menu entry.
- Additionally, you can also use the Windows Logo Key + R key combination in order to bring up the Run dialog box. Type in “cmd” in the dialog box which appears and use the Ctrl + Shift + Enter key combination for admin Command Prompt.

- Type in the following commands in the window and make sure you press Enter after typing each one. Wait for the “Operation completed successfully” message or something similar to know that the method worked.
sfc /scannow
- Try to restart your computer and check to see if the Unhandled Exception has Occurred in your Application error continues to appear on your computer.
Solution 9: Performing a Clean Install
If none of the methods presented below have managed to help you in resolving the issue, it’s very likely that you’re dealing with some kind of Windows inconsistency that cannot be resolved conventionally.
If this scenario is applicable, you should be able to fix the issue by resetting every component associated with your Windows installation. If you want to go this route, you have two ways forward. It all boils down to the procedure that you want to follow:
- Repair install (in-place repair) – This procedure is the best approach when you need to refresh every OS component, but some users might end up considering it a little too tedious for their taste. Keep in mind that you will need a compatible installation media in order to enforce this fix, but the major advantage is that all your personal data (including games, applications and personal media) will be preserved even if you don’t back up your computer.
- Clean install – If you’re looking for the simplest solution, this is the way to go. You will not need an installation media to enforce it (it’s all done through the Windows GUI). But unless you back up your data in advance, be prepared for total data loss.